Thursday, 31 March 2011
BLOG POST CHECK LIST
This will be printed out at the end of the project and become your PRODUCTION JOURNAL.
The BLOG POSTS should be a complete record of your progress producing the MOVIESTORM SHORT FILM UNIT.
The posts should include SCREEN GRABS, PHOTOS (Digital Camera & Photo Booth) and some INTERNET CONTENT linked to areas of your project RESEARCH.
PRE-PRODUCTION
SESSSION 1: Initial ideas
SESSSION 2: Roles
SESSSION 3: Moodboard
SESSSION 4: Proposal
SESSSION 5/6: 9 key frames
SESSSION 7/8: Storyboards
SESSSION 9: Shotlists
SESSSION 10: Production Schedule
PRODUCTION
SESSSION 11 > 19: Moviestorm short film production
DEADLINE (THURSDAY 9 am - 6th April)
SESSSION 20: Screening & feedback
Wednesday, 30 March 2011
Tuesday, 29 March 2011
MOVIESTORM SESSION 8 & 9: STORYBOARDS & SHOTLISTS
Monday, 28 March 2011
PHOTOGRAPY UNIT SESSION - CRIME SCENE

For the CRIME SCENE PROJECT the UNIT BRIEF says that there MUST be evidence that your photographs have "combined images from different sources".
This can be done in a number of ways, here are a few suggestions:
1. Add props to your photograph e.g. guns, knives, police tape etc.
2. Add a different background
3. Add textures to your photograph e.g. scratches, tears etc.
4. Add a frame to your photograph. Search the internet for Photoshop frames.
(Here is a set that I have found: http://www.photoradar.com/techniques/technique/50-free-photo-frames-and-borders-for-photoshop )
Friday, 25 March 2011
SESSION 6 & 7: PRE-PRODUCTION: THE 9 KEY FRAME GRID PART 1
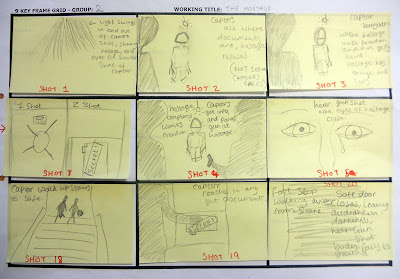
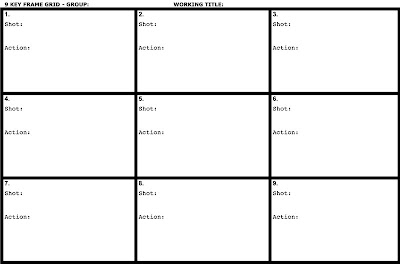
SESSION TASK: THE 9 KEY FRAME GRID (PART 1)
In your groups, create 9 KEY FRAMES for your short film.
- Each KEY FRAME should be drawn on a POST-IT.
- Stick the 9 POST-ITS on the A3 GRID SHEET.
- The key frames DO NOT have to be in a sequential order.
- Divide the task of drawing out the key frames between all members of the group. i.e. do not have just one person do all the drawing!
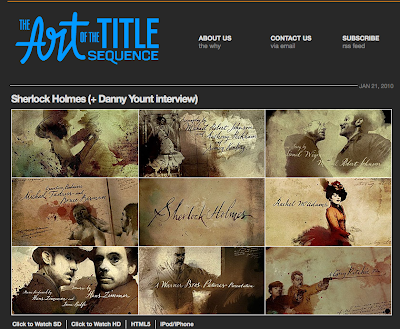
The ART OF THE TITLE website uses the 9 key frame grid to show the visual style of a film opening.
Thursday, 24 March 2011
SESSION 4 & 5: PROJECT PROPOSAL
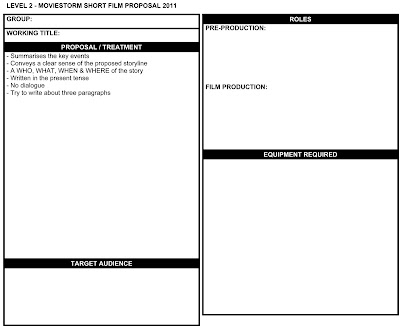
CLICK THE IMAGE TO ENLARGE
Each group must fill out the PROPOSAL FORM and email it to print.
The sections are:
1. WORKING TITLE
What is your short film going to be called?
2. PROPOSAL / TREATMENT
- Summarises the key events
- Conveys a clear sense of the proposed storyline
- A WHO, WHAT, WHEN & WHERE of the story
- Written in the present tense
- No dialogue
- Try to write about three paragraphs
3. TARGET AUDIENCE
Who will watch your film?
Who will the film be aimed at?
4. ROLES
List who is doing what.
Pre-production: Production Designer (settings/locations), Character Designer and Screenplay Writer
Film Production: Director, Camera Operator (creating the shots), Editor, Sound Designer and Title Sequence / Credits Designer
5. EQUIPMENT REQUIRED
Laptop
Microphone
Headphones
Headphones splitters
+ Software:
Moviestorm
Final Cut
Photoshop
Garageband
Wednesday, 23 March 2011
UNIT 6: AO1 - TWO MOVING IMAGE PRODUCTS ANALYSIS GRID & WRITE-UP
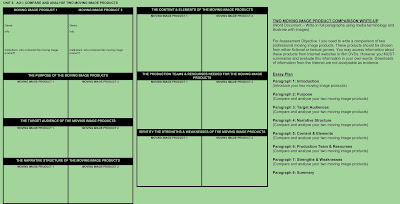
CLICK ON IMAGE TO ENLARGE
TWO MOVING IMAGE PRODUCT COMPARISON WRITE-UP
(Word Document – Write in full paragraphs using media terminology and illustrate with images)
For Assessment Objective 1 you need to write a comparison of two professional moving image products. These products should be chosen from either fictional or factual genres. You may access information about these products from Internet websites or film DVDs. However you MUST summarise and evaluate this information in your own words. Downloads of information from the Internet are not acceptable as evidence.
Essay Plan
Paragraph 1: Introduction
(Introduce your two moving image products)
Paragraph 2: Purpose
(Compare and analyse your two moving image products)
Paragraph 3: Target Audiences
(Compare and analyse your two moving image products)
Paragraph 4: Narrative Structure
(Compare and analyse your two moving image products)
Paragraph 5: Content & Elements
(Compare and analyse your two moving image products)
Paragraph 6: Production Team & Resourses
(Compare and analyse your two moving image products)
Paragraph 7: Strengths & Weaknesses
(Compare and analyse your two moving image products)
Paragraph 8: Summary
Tuesday, 22 March 2011
SESSION 2 & 3: PRE-PRODUCTION ROLES & PLANNING
Friday, 18 March 2011
Thursday, 17 March 2011
Wednesday, 16 March 2011
Tuesday, 15 March 2011
Moviestorm in Education - Long Road 6th Form College
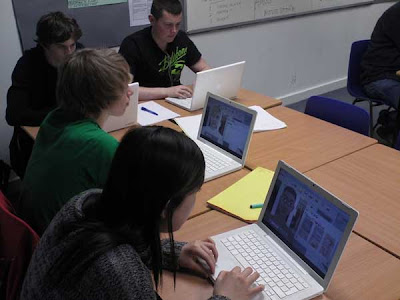
At the end of last week, Alex and I had the pleasure of going into Long Road Sixth Form College, Cambridge to show some of the L2 students how to use Moviestorm for an upcoming project that they have to complete as part of their Media Studies course.
As we had the opportunity to spend most of the day with the class, Alex introduced the students to the Set Workshop view in the first session and then we answered a few questions while they practised making their own sets within Moviestorm. We had just enough time to demonstrate the Dressing Room and Directors View before lunch, and finished the day with the Camera Workshop View and Cutting Room. The students picked up the software very quickly and were able to start assembling scenes in a very short time (despite a couple of hardware issues that we have brought back to the dev team to find solutions for), and seemed comfortable finding solutions to their problems between them when they got stuck. Seeing their progress was a testament to their computer skills, and also reinforced our beliefs that most people can get a project up and running in Moviestorm within a day, even if they are new to the software.
We'd like to thank Steven Thorne at Long Road Sixth Form College for allowing us to come in and demonstrate Moviestorm, and to the students for being so receptive. We look forward to returning and seeing your movies in a few weeks' time!
Friday, 11 March 2011
MOVIESTORM SESSION
THIS SESSION WILL NOW RUN AT 10.50 AM, ON FRIDAY 11th MARCH.
Moviestorm enables you to create animated movies, using machinima technology. It takes the you from initial concept to finished, distributed movies.
Sets and characters can be created and customised, and scenes can be filmed using multiple cameras.
Thursday, 10 March 2011
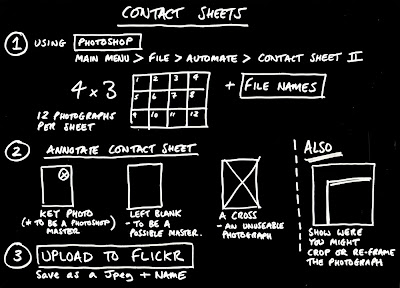
CONTACT SHEETS
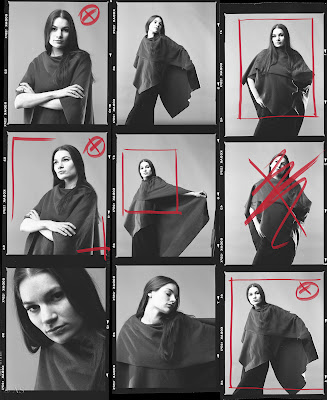
Contact sheets are ideal for laying out your images on a page and allow you to view them side by side in order to make comparisons.
Contact prints were originally created in the darkroom by placing negatives on top of developing paper then exposing them to light from the enlarger above. The photographer could then view individual thumbnails of each image and decide which ones to go ahead and print.
CLICK ON IMAGE TO ENLARGE
Create CONTACT SHEETS of all your photographs
Upload the contact sheets to FLICKR
In Photoshop MAIN MENU > FILE > AUTOMATE > CONTACT SHEET II
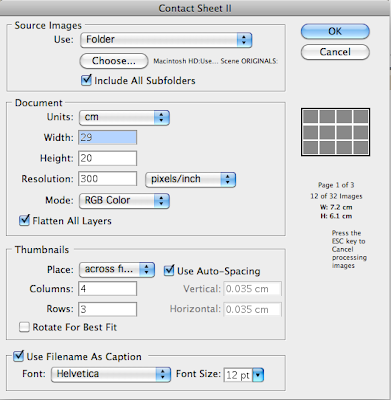
CLICK HERE for a demonstration video I found on the internet.
Friday, 4 March 2011
Thursday, 3 March 2011
PHOTOGRAPHER CASE STUDY 3: Henri Cartier-Bresson
Henri Cartier-Bresson
PHOTOGRAPHER CASE STUDY 3
Henri Cartier-Bresson will be your third and final PHOTOGRAPHER CASE STUDY
1. Write a short biography about the photographer.
(early life/career etc.)
2. Describe the visual style of Henri Cartier-Bresson.
3. Then choose THREE Photographs produced by Henri Cartier-Bresson.
- add the photograph (it needs to be a large image).
- add the details (title, date, size & materials) of the photograph.
- write a short analysis of the photograph.
YOU MUST WRITE DOWN ALL YOUR SOURCES
Make a list of all the URLs you used with the research.


